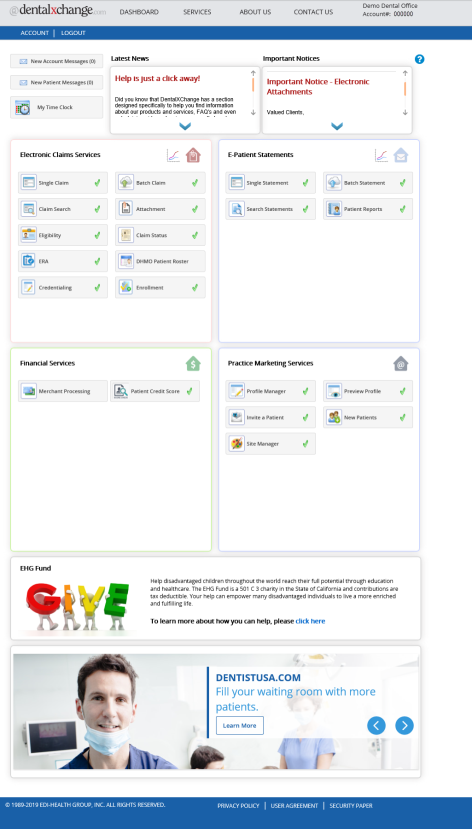
Account Settings
The Account page allows administrative level users to review and make changes to the DentalXChange account information..
Visit our Video Library for more helpful tutorials.
- From the Dashboard page, navigate to the Account
 button in the top left corner to view account page settings.
Account Page
- The Account page settings displays.
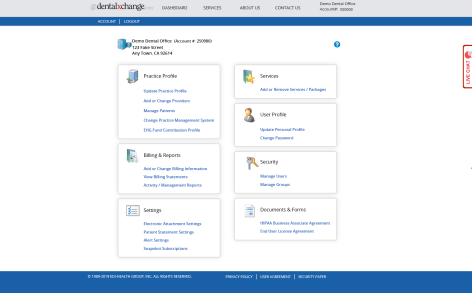
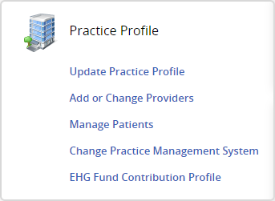
Practice Profile
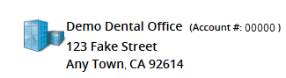
- The practice information displays in the top left corner of the account page.
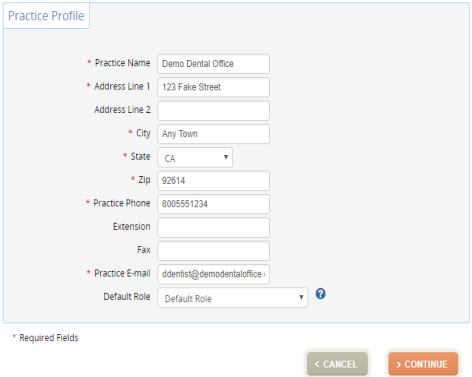
The Practice Profile is a one stop shop for updating practice, provider, patient, PMS, and EHG Fund contribution information.
- Update Practice Profile – Provider may change the practice name, address, phone number, or Email.
- Select the Update Practice Profile button.
- Enter the information pertaining to the practice.
- Select the Continue button.
- Add or Change Providers – Add providers to the account or edit the current providers listed.
- The Add or Change Providers page is where all provider profile information is entered and stored on the account. A provider profile must be created for every provider the practice submits claims for. Additionally, information entered on the Provider Profile page populates in the billing and rendering provider fields on claim forms. DentalXChange only submits the provider information listed on the profile provider. When the provider information entered on claims does not match the provider information listed on one of the provider profiles, the claim will stay in validation error status until a provider match is completed. Claims cannot be submitted for providers who are not added to the account when submitted claims by Direct Data Entry (DDE).
- Select the link below to view the video tutorial on this subject.
-
 Managing Providers
-
Compete a Provider Match
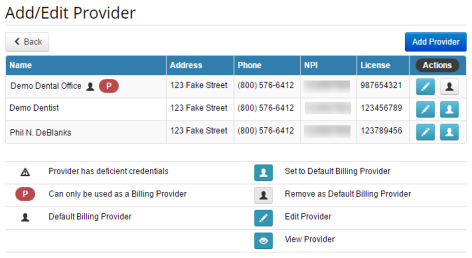
- Select the Add Provider button
 to add a new Provider to the account.
 - Select the Edit
 button to update the provider profile.
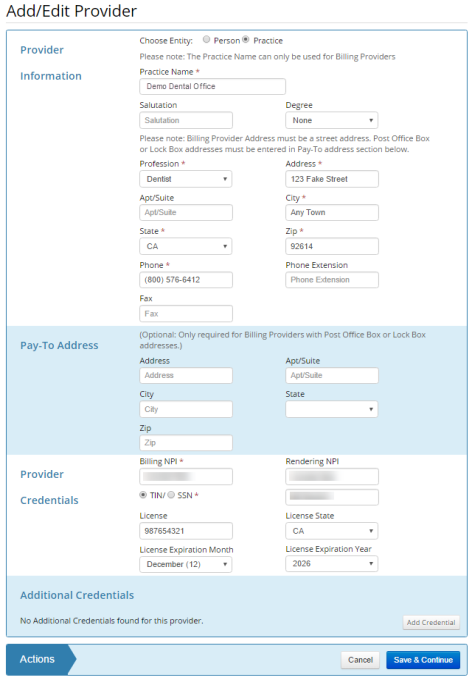
 - Choose Entity – A provider can be a person or the practice. If Practice is selected, the Provider Profile may be used as a Billing Provider only.
- Complete the Practice Name, Profession, Address, Phone, and Fax fields.
- Pay-To Address – Complete address fields only if the Billing Provider has a Post Office Box or Lock Box address.
- Provider Credentials – Complete the NPI, Tax ID Number, and license information fields.
- Select the Save & Continue button to add the provider information.
- Select the Default Billing Provider icon to set or remove a default billing provider.
- Icons defined:
- Provider has deficient credentials – The provider profile has incorrect information or is incomplete. The profile must be corrected before claims may be sent for this provider.
- Can only be used as a Billing Provider – The provider profile may not be listed as a rendering provider on a claim. Submitting this provider as a rendering provider will result in a validation error.
- Default Billing Provider – The default billing provider is automatically entered as the billing provider on all submitted claims on the account.
- Select the Add Provider button or Edit button to display the Add/Edit Provider screen.
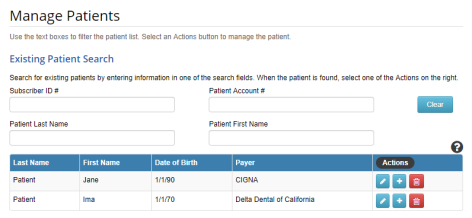
- Manage Patients – Edit stored patient information. Manage Patients displays on accounts with Patient Storage. Patient Storage creates a patient profile for Direct Data Entry claims that are created on the account. From the Manage Patients page, search, view and edit stored patient profiles. Search for a patient profile by entering a Subscriber ID #, Patient Account #, Patient Last Name, or Patient First Name. Once the patient profile is displayed, select one of the following Actions:
The Pencil icon to edit a patient profile.
The Plus icon to add a dependent to a patient profile.
The Trash Can icon to delete a patient profile from the account.
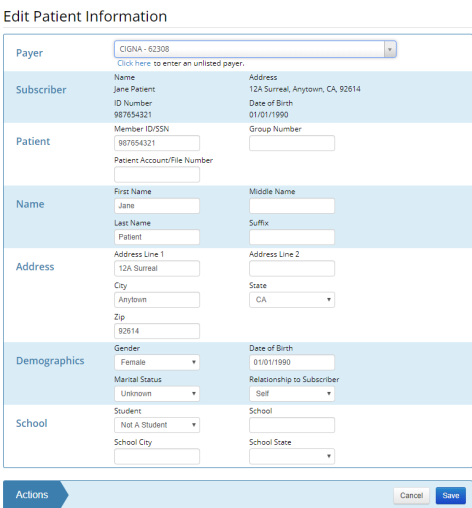
- Edit fields to update the patient profile.
- Select the Save button to confirm all edits.
- Change Practice Management System – Change the Practice Management System (PMS) specified to a different software solution than selected during Worry Free Registration.
- Select the Account button in the top left of the Dashboard page.
- Select Change Practice Management System link from the Practice Profile section.
- Select the appropriate Practice Management System from the drop-down list. Selecting the Undo Change button cancels any changes and reverts the account o the original PMS selection.
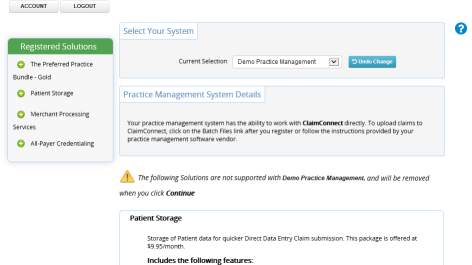
- Select the Remove button to confirm removal of packages, as a result changing the PMS.
- Select the Cancel to cancel these changes.
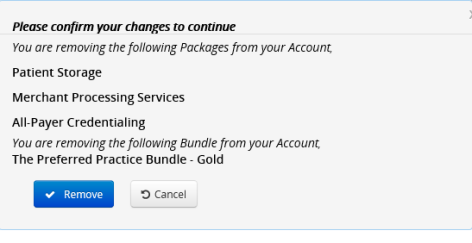
- A confirmation to remove the packages not support appears.
- Confirm and proceed until returned to the Dashboard page.
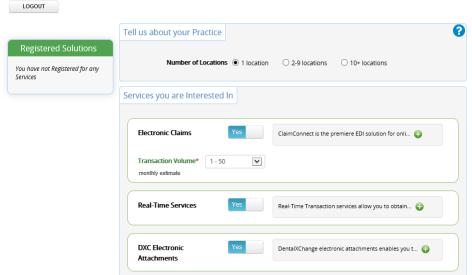
- Select the Continue button at the bottom of the page.
- The Services you are interested in page appears. Select the green plus icon to view details of each service.
- Select the round circle minus icon to collapse services details.
- Toggle Yes/No button to select services Practice is interested in.
- All fields are defaulted to Yes. User must choose a Transaction Volume when Electronic Claims service is selected.
- Select radio button to add bundles & packages to account. Radio button will show green check mark when package or bundle is selected.
- Select Continue button at bottom of page to proceed.
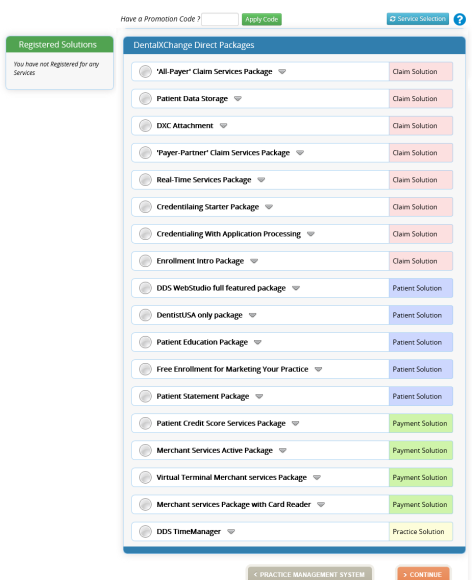
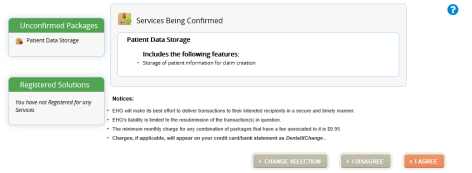
- Services Being Confirmed section appears. Review selected packages.
- Select the I Agree button to continue.
- Users are returned to the Dashboard page when completed.
- EHG Fund Contribution Profile – Change current EHG Fund contribution settings.
Billing & Reports
- Select the link below to view the video tutorial on this subject.
- Billing & Reporting
- Add or Change Billing Information – Add new credit card or checking account information to the DentalXChange account.
- View Billing Statements – Displays monthly charges. All statements will be available to view by month starting from the account open date.
- Activity/Management Reports – Generate reports filtered by Statement of Actual Services, Pretreatment Estimates, Encounters, Submission Date Range, Payer, Provider, Claim Status, Report Type, Active or Active and Deleted Claims.

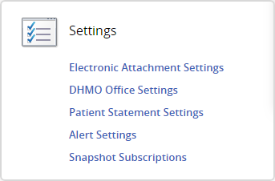
Settings
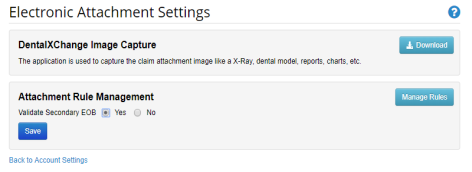
- Electronic Attachment Settings – Download the DentalXChange Image Capture application DentalXChange Management Desktop and Enable validation error reporting for secondary EOBs.
- DentalXChange attachment services enables practices to complete attachments quickly and easily from ClaimConnect.
- Practices have the option to type narratives, capture upload images, re-use archived images, or upload capture images using the DentalXChange Desktop Services application.
- ClaimConnect validates claims for a number of items including attachment requirements, determines and flags claims that will require attachments based on the procedure code and payer.
- Validation rules are supplied by the payer and may be customized by each provider. These claims are flagged as needing attachments.
- For further information on DentalXChange attachments select here.
- DHMO Office Settings – Provided at no extra charge with ClaimConnect registration. Find patient rosters, encounter submissions, payment and capitation reports.
- Patient Statement Settings – Specify patient statements settings including format, forms of payment accepted, delivery method, and due date default settings.
- Once selected complete the information. All providers with an e-patient statements package on the account must set up patient statement options before statements can be delivered.

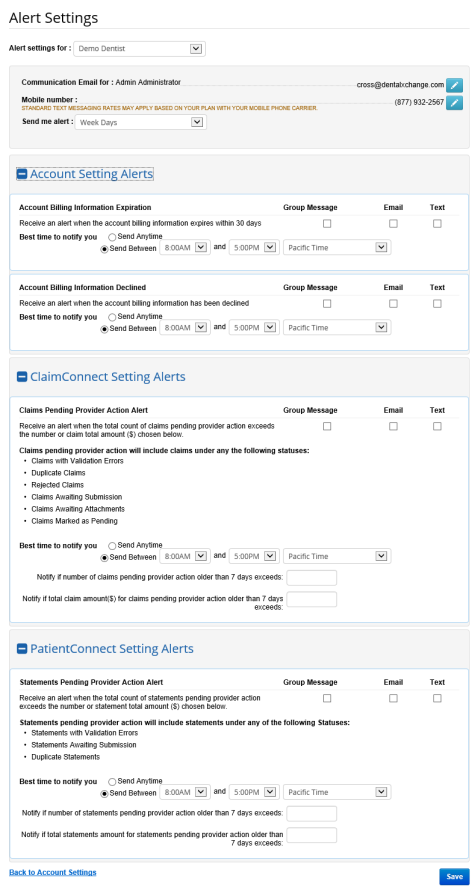
- Alert Settings – Manage validation error alert settings for Billing, ClaimConnect and PatientConnect. Edit user or group email address, mobile number, send me alert properties and best time to notify the users.
- Account Setting Alerts – Providers may receive account messages from Account Setting if the account billing information expires within 30 days. A pop-up warning will appear upon login or if billing information is declined.
- ClaimConnect Setting Alerts – Providers may receive account messages from ClaimConnect when the account is idle for a specified number of days with no claims or a month to date count of claims submitted to the payer every 30 days.
- PatientConnect Setting Alerts – Providers may receive account messages from PatientConnect when a new patient message is received or a month to date statement submissions submitted to the patient every week.
- Select the link below to view the video tutorial on this subject.
- Alert Settings
- Snapshot Subscriptions – Update settings for the Activity Snapshot application. Access a summarized dashboard display as well as individual detailed reports by transaction.
Services
- Add or Remove Services/Packages –Add or remove services or packages on the account. The process is similar to the Change Practice Management system.
- Select the link below to view the video tutorial on this subject.
- Add a Service or Package
- Change Practice Management System

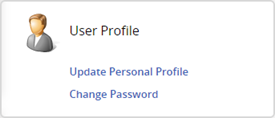
User Profile
- Update Personal Profile – Update the personal user profile.
- Edit name, address, phone number, email information and specialty.
- Change Password - Change the user password.
- Password must be updated every 90 days to comply with HIPAA standards.
- Note: This system requires strong passwords. Login Passwords must contain at least 3 out of the 4 following parameters: Passwords must contain one upper case alphabetic character (A – Z); one lower case alphabetic character (a – z); at least one number, from 0 – 9); one special character, and be a minimum of 8 characters long. Characters cannot be repeated. The password hint itself, cannot contain the password.
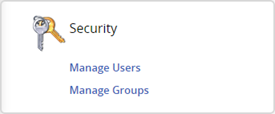
Security
- Manage Users – Add a new user login and edit an existing user login.
- Note: This feature can only be accessed by an administrative level user.
- Select Add New User button and complete the form, ensure the role for the user is selected. Use the "?" mark to view roles, if necessary.
- Ensure the Auto generate a password is selected. A password will be emailed to the user.
- Select Continue.

- Manage Groups – Link an account to another DentalXChange account.
- This feature is used by DentalXChange staff only.
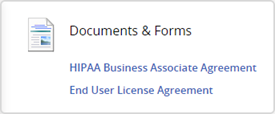
Documents & Forms
- HIPAA Business Associate Agreement – Review/View and agree to the HIPAA Business Associate Agreement.
- End User License Agreement (EULA) – Review/View and agree to the EULA. The date and time the EULA was signed displays.
*For further assistance, please Contact Us