E-Patient Statements
Electronic Patient Statements is a processing service created specifically for dentists to eliminate the need to print and mail statements from the practice.
Visit our Video Library for more helpful tutorials.
Patient Statement Profile
The Patient Statement Profile is used to set statement format, payment, and delivery options for all statements sent from the account. When an e-patient statements package has been added to the account the user will need to setup the Patient Statement Profile under Account, Patient Statement Settings. The Patient Statement profile can be accessed from the Account page for edits and updates.
- Select the link below to view the video tutorial on this subject.
 Managing Providers
- Provider Setup for E-Patient Statements
- Navigate to the Account Page, under Settings section and select Patient Statement Settings.
- The Patient Statement Profile displays.
- At a minimum make Statement Format, Service Type, and Credit Cards Accepted selections to proceed.
- The default Statement Format option is Five Column display.
- Suspend for Review Before Submission: Select Yes to require review of batch uploaded statements before sending to a patient. Select No to have statement sent to patient after submission. This feature is used for batch statement only.
- Service Type selections pertain to returned mail services in the event that the patient has moved without providing notification to the provider.
- Select All Address Services to have the statement returned with reason for non-delivery attached or statement forwarded, there are no fees charged; separate notice of new address provided incurs correction fee.
- Select Forward Address Service to have the statement forwarded to the patient.
- Select Return Address Service to have the statement returned to the practice with the patient’s new address.
- Select Change Notification Service to have the statement forwarded to the patient and to have a new address notice sent to the practice. This option may incur a fee.
- Select the Credit Cards Accepted for each option that applies to the practice.
- Select Yes in the Override Due Date on Statement field to replace the default statement due date with custom text.
- Selecting Yes in this field also overrides information populated from a Practice Management System.
- Enter a custom message in the Override Due Date Text on Statement field when Override Due Date on Statement is marked Yes.
- Select a number of days in the Due Date After field to specify the number of days a patient is allowed to make payment after the statement has been submitted.
- In the Electronic Delivery (Email) field select On to assure that statement ready email notifications are sent to the patient when statements are submitted via batch.
- Note: Patients have 7 days to review the statement using the secure link sent via email. Failure to use the secure link to access the statement will default the patient to statement delivery by mail.
- When a patient’s electronic delivery option is set to no, DentalXChange prints and mails the patient statement.
- The patient electronic delivery option may be set to no for several reasons. The patient did not click on the secure link in their statement ready email within the allotted 7 days after the email has been received. Or, the patient has deselected receive an email notification option in the User Information section on the Patient Portal.
- Print Statements with Invalid Email may be toggled to Yes or No.
- The Require Patient Account Number Yes or No toggle is used when a practice wants to suppress or does not assign a patient account number to their patients.
- Online Payment URL – Select Default URL to invite patients to receive and manage their statements online using the PatientConnect portal. The patient will be able to pay their statement using the Default URL if the practice has merchant services with DentalXChange. Select Custom URL if the practice has a different website where the patient can make payments online.
- Show Payment URL on Printed Statements: Select Yes to show the URL on printed statements so patients can view and manage statements online. Select No if the practice does not want to grant online access to patients.
- Select the Save button to proceed.

Single Entry
DDE Statement Submission
Direct Data Entry (DDE) Statements is an online solution for generating, and submitting patient statements to patients directly through DentalXChange. The DDE Statement form allows a provider to submit one statement at a time through the DentalXChange website. No PMS is needed.
- Select the link below to view the video tutorial on this subject.
- Create Patient Statements Using E-Patient Statements
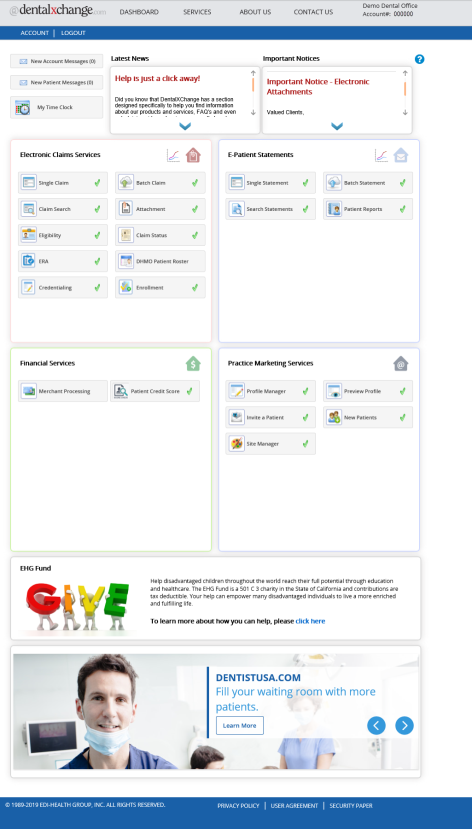
- From the Dashboard page, under E-Patient Statements, select the Single Statement button, or
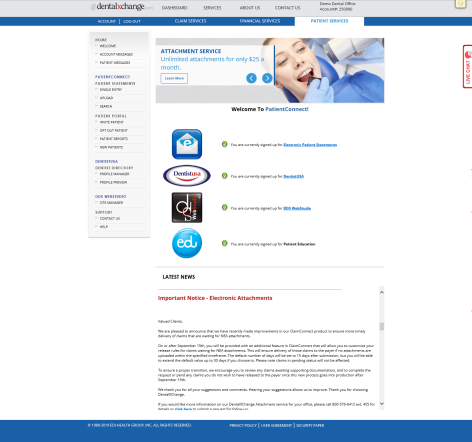
- From the PatientConnect Welcome page select the Single Entry link in the Patient Statements section of the menu.
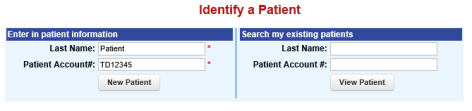
- Enter patient information in the left Enter Patient Info fields. All fields are required including the provider assigned patient account number.
- Select the New Patient button to proceed.
- Providers with Patient Storage can select a patient from the Existing Patient list.
- Enter patient information in the right Search Existing Patients fields.
- Select the View Patient button to proceed.
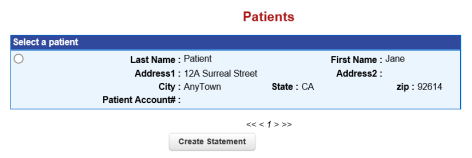
- A listing of available patients displays.
- Select the desired patient.
- Select the Create Statement button to proceed.
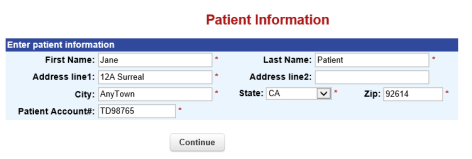
- Enter additional patient information. All fields are required.
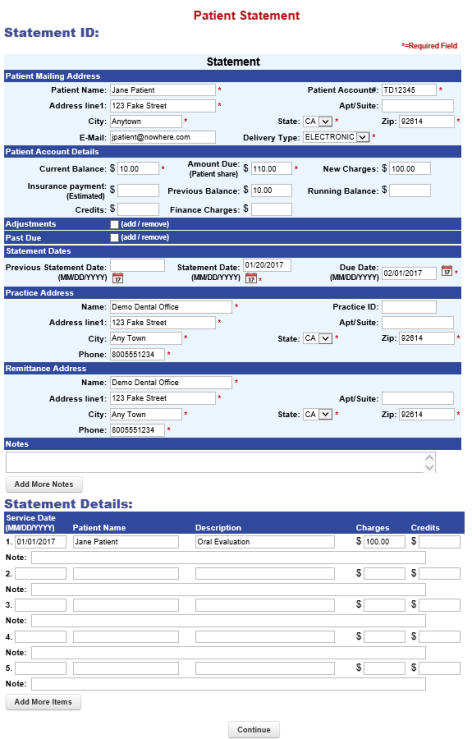
- Enter the statement details.
- Required fields are marked with an asterisk (*).
- Enter an email when electronic is selected in the Delivery Type field.
- Note: Statements sent via electronic delivery are emailed to the patient within 3 hours.
- Note: Statements sent via paper are mailed to the patient either by first class mail, same day delivery, or next day delivery.
- Select the Continue button to proceed.
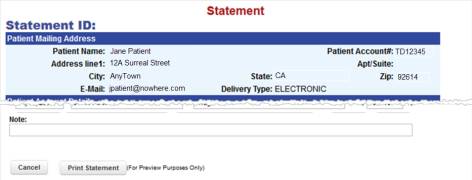
- Review the statement preview before submission.
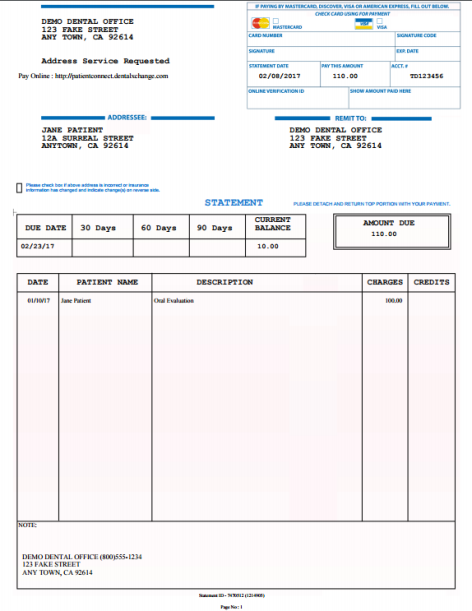
- Select an action at the bottom of the page to proceed.
- Select Print Statement to review a PDF version of the statement.
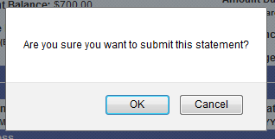
- Select the Submit button to submit the statement.

- A pop-up confirmation window is displayed.
- Select OK pop-up to proceed.
- The statement submission confirmation displays.

Upload
Batch Statements allow a provider to submit statements to patients directly through the DentalXChange site using a PMS. The provider can track and monitor these statements in PatientConnect. The word batch refers to the process of submitting multiples at one time. Each batch of statements submitted to DentalXChange from a PMS generates a batch file. Based on the level of software integration with ClaimConnect, the Batch statement files are submitted via Post, Upload, or Capture.
Post
Batch statements are submitted using the Post method when the PMS is fully integrated with ClaimConnect. The DentalXChange account username and password are embedded in the PMS software allowing direct access to ClaimConnect and PatientConnect.
- Review the user guide for the PMS for more information on submitting statements.
- A confirmation message displays when a batch has been successfully transmitted from the PMS to PatientConnect.
Upload
Batch statements are submitted using the Upload method when the PMS is not fully integrated with ClaimConnect nor compatible with the DentalXChange Management Desktop (DMD). A batch of statements is created within the PMS which in turn generates a statement file. The statement file is uploaded to the DentalXChange account. The Upload option is visible to providers who have selected compatible PMS software during Worry Free Registration.
- From the Dashboard page, under E-Patient Statements, select the Batch Statement button, or
- From the PatientConnect Welcome page select the Upload link in the Patient Statements section of the menu.
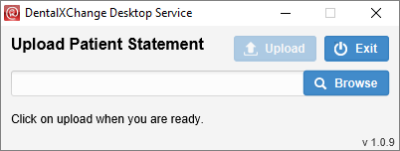
- Select the Upload Statements button to begin the process.
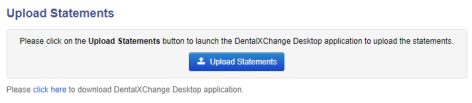
- Select the Browse button and locate the file and attach.
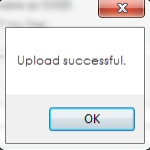
- Select the Upload button to submit the statement file.
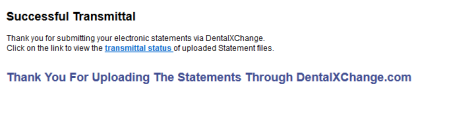
- The Successful Transmittal message displays upon successful upload.
Capture
Batch statements are submitted using the Capture method when the PMS is not integrated with ClaimConnect, and if the PMS either doesn’t create a statement file, or the statement file format created is incompatible with the PatientConnect Upload method. In this case the provider should use the DentalXChange Management Desktop (DMD) application to capture the information from their non-integrated PMS. The DMD is a virtual printer that allows DentalXChange to capture the information for electronic submission. It must be installed on the provider computer before items can be submitted. The DMD can be installed from the provider DentalXChange account.
- Providers requiring a new DentalXChange Management Desktop install must download the DMD from ClaimConnect Batch Claims page.
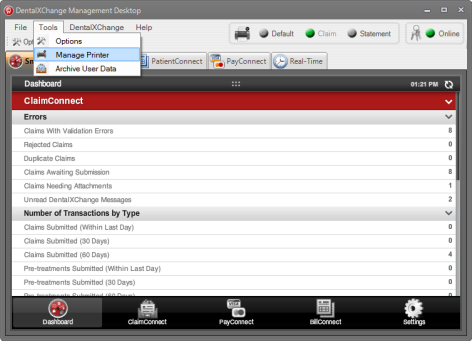
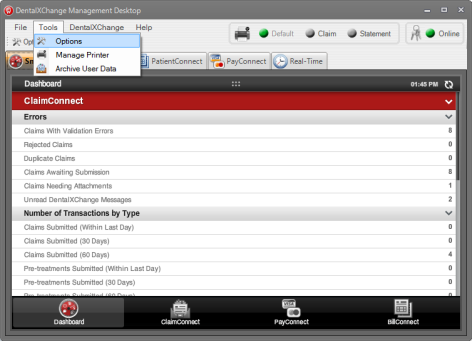
- Providers with the DMD installed select Manage Printer in the Tools menu.
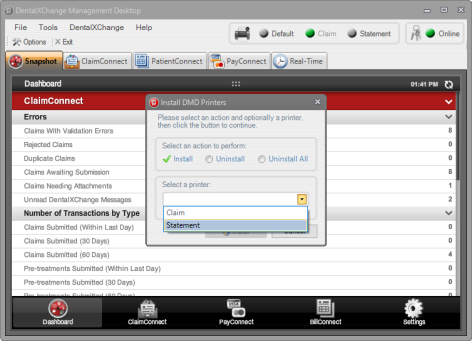
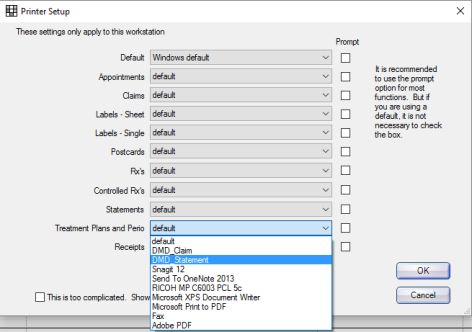
- Select Install in the Select an Action to Perform field.
- Select Statement in the Select a Printer field.
- Select the Install button.
- The printer is installed.
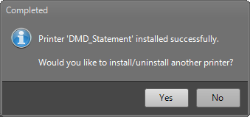
- Select No in the Installation Complete dialogue box to proceed.
- Select Options in the Tools menu to configure the statement printer.
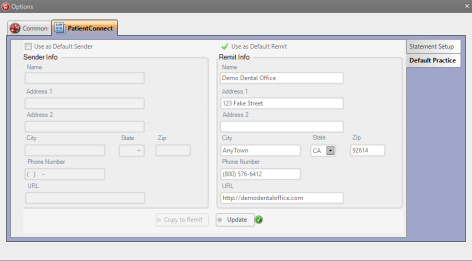
- Select the PatientConnect tab.
- Select the Default Practice tab.
- Enter a remit address in the Remit Info section.
- Select the Use as Default Remit checkbox.
- Select the Update button to complete configuration.
- Close the window.
- There are two ways the DMD can be used to transmit statements to PatientConnect:
- Print to DMD, or
- Manually Import in to DMD.
Print to DMD
- Some PMS software allow a user to set DMD as a default printer and print statements directly to the DMD.
- See the DMD Guide for more information on DMD setup.
Manually Import to DMD
- Statements can be manually imported in to the DMD if the provider PMS does not allow a user to set the DMD as the default printer.
- Print the statement(s) from within the PMS according to the guidelines for that PMS.
- Select the PatientConnect tab in the DMD.
- Select the Statement printer in the printers list at the top of the screen.
- Select the Import button.
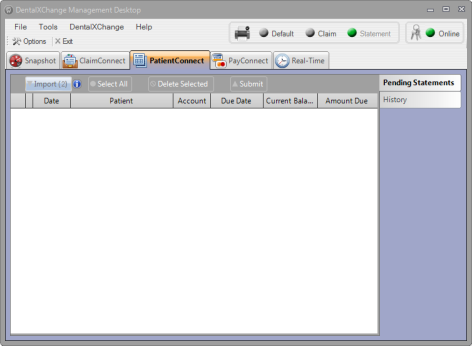
Viewing & Submitting Statements
- When statements have been imported in to the DMD, either by printing to the DMD, or by manually importing to the DMD, they can be reviewed and submitted to PatientConnect.
- View statements on the PatientConnect tab.
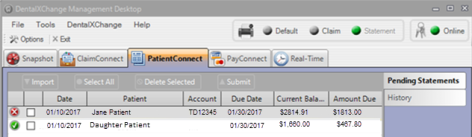
- Red X
 button displays next to statements that have a validation error.
 - Green check mark
 button displays next to statements that are ready to submit.
 - Statements with validation errors must be corrected in the PMS before submitting.
- Common errors include a missing remittance address or a missing billing address.
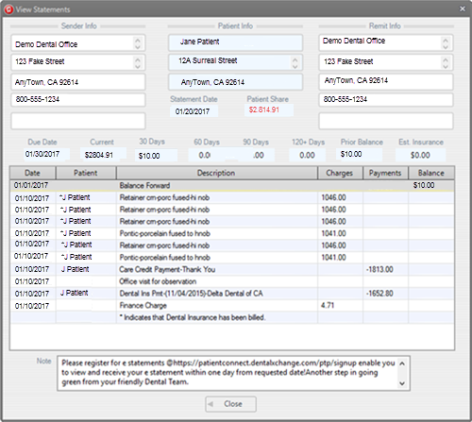
- Double click a statement from the statement list to view the errors that require correction.
- Note: Statement errors cannot be corrected in the DMD.
- Statement information displays in a separate window.
- Validation errors are denoted in red.
- Note: The Patient Share is also denoted in red.
- Select the Close button to close the View Statements window.
- Validation errors must be corrected within the PMS. Once the error has been corrected, the statement must be deleted from the DMD and resent to the DMD for submission.
- Select the selection checkbox for the statement to be deleted.
- Select the Delete Selected button to proceed.
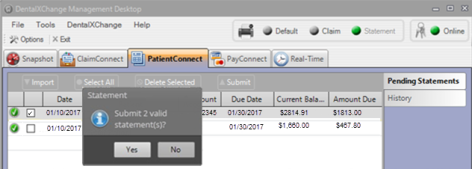
- Select the Submit button to submit statements to PatientConnect.
- Select the Yes button on the pop up window to confirm submission.
- The DentalXChange site launches when statements are submitted successfully and opens to the Statement Search page.
- Users without access to the DMD may also upload statements directly through PatientConnect.
- Select the Upload link in the left menu under Patient Statements section.
- Select the Upload Statements button to begin the process.
- Select the Browse button and locate the file and attach.
- Select the Upload button to submit the statement file.
Search
All statements entered in to PatientConnect are searchable and can be reviewed at a later time regardless of status once they have been assigned a Statement ID.
- From the Dashboard page, under E-Patient Statements, select the Search Statements button, or
- From the PatientConnect Welcome Page select the Search link in the Patient Statements section of the menu.
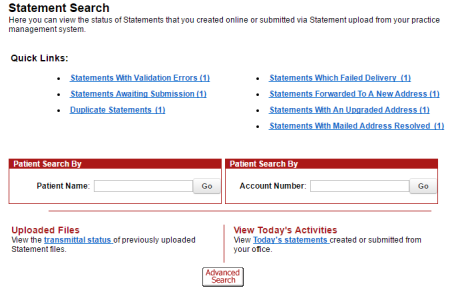
- The Statement Search page features quick links to view Statements with Errors, Statements Awaiting Submission, Duplicate Statements, Statements which Failed Delivery, Statements Forwarded to a New Address, Statements with an Upgraded Address, uploaded file transmittal status, Today’s Activities, and a manual search tool bar.
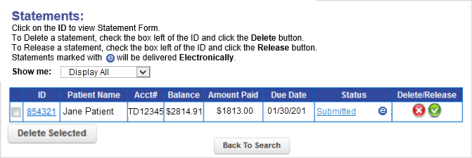
Statuses/Releasing of Statements
DentalXChange provides a streamlined statement experience by conducting initial statement address and information verification. This verification assigns a status to a statement in order to not only give providers updates on which part of the delivery process a statement has reached, but also to identify statements that may result in undeliverable mail.
- During statement searches, statements display in a table format with several available links and actions:
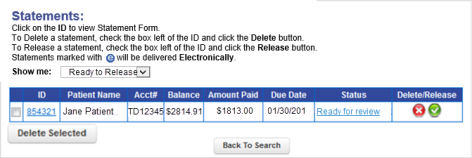
- Select the ID or Status link in the ID column or Status column respectively to view the statement and any applicable errors.
- Select the delete button to delete a statement.
- Select the release button to release a statement when Suspend Statements for Review has been selected in the Patient Statement Profile.
Quick Links
Similar to the View All Problem Claims section of the ClaimConnect Claim/Encounter Search page, the Quick Links section of the Statement Search page identifies errors that have occurred. While some links focus on errors than can be corrected before a statement is mailed, other links focus on errors that have occurred after the statement is mailed.
Statements with Validation Errors
Statements with Validation Errors include any statements that have not passed PatientConnect validation process. Common errors include mismatched city and zip code pairs and other address to United States Postal Service comparison mismatches.
- Select the Statements with Validation Errors quick link.
- A list of statements with errors displays in a table format.
- Select the Validation Errors link in the Status column.

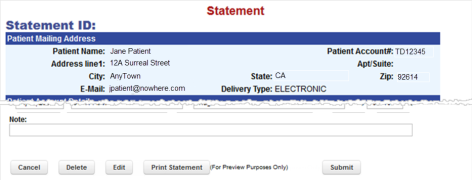
- The Statement Preview page displays.
- Select an action from the bottom of the screen.
- Select the Edit button to correct the errors.
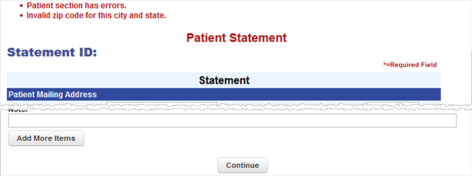
- The form is opened for edits.
- Validation errors display at the top of the page in red.
- Correct the affected fields.
- Select the Continue button at the bottom of the page to proceed.
- The Statement Preview displays with new actions at the bottom.
- Select Submit to submit the statement.
Statements Awaiting Submission
Statements Awaiting Submission include any statements that have been previously saved for later submission.
- Select the Statements Awaiting Submission quick link.
- A list of statements awaiting submission displays in a table format.
- Select the Ready for Review link in the Status column.
- The Statement Preview page displays.
- Select an action from the bottom of the screen.
- Select the Submit button to submit the statement.
Duplicate Statements
Statements that have been submitted more than once within a ten day period are classified as duplicate statements.
- Select the Duplicate Statements quick link.
- A list of duplicate statements displays in a table format.
- Select the Duplicate Statement link in the Status field.
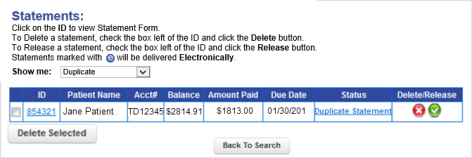
- The Statement Preview page displays.
- Select an action from the bottom of the screen.
- Select the Remove Duplicates button to proceed.

- The form is opened for edits with new actions at the bottom.
- Select the Delete button to delete statements that have already been submitted.
Statements which Failed Delivery
Statements that could not be successfully mailed to the patient are categorized as Statements which Failed Delivery. These statements are maintained for information purposes only
- Select the Statements which Failed Delivery quick link.
- A list of statements which failed delivery displays in a table format.
- Select the Mailing Undeliverable link in the Status column.
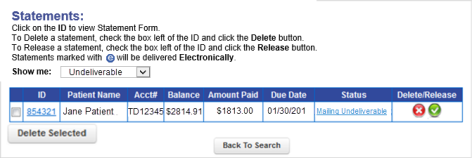
- The Statement Preview page displays with limited actions at the bottom.
Statements Forwarded to a New Address
Statements that were forwarded to a patient’s new address are categorized as Statements Forwarded to a New Address. These statements are maintained for information purposes only to alert the provider that the patient address on file in PatientConnect or in the PMS requires update.
- Select the Statements Forwarded to a New Address quick link.
- A list of statements that were forwarded to the patient displays in a table format.
- Select the Mailing Successful link in the Status column.
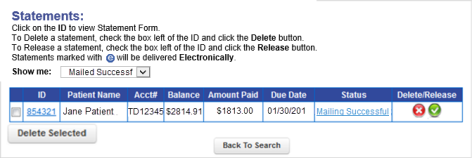
- The Statement Preview page displays with limited actions at the bottom.
- Providers with the patient storage package update the patient’s address in the Manage Patients menu.
- Providers with a batch statements package update the patient’s address in the Practice Management System.
Statements with an Upgraded Address
Statements with addresses that were upgraded by the United States Postal Service are categorized as Statements with an Upgraded Address. These statements require additional handling from the post office and may incur a fee requested of the provider office directly from the local postal worker. These statements are maintained for information purposes only to alert the provider that the patient address on file in PatientConnect or in the PMS requires update.
- Select the Statements with an Upgraded Address quick link.
- A list of statements which were mailed to the patient while an updated address notice was mailed to the provider displays in a table format.
- Select the Address Upgraded link in the Status column.

- The Statement Preview page displays with limited actions at the bottom.
- Providers with the patient storage package update the patient’s address in the Manage Patients menu.
- Providers with a batch statements package update the patient’s address in the Practice Management System.
Statements with Mailed Address Resolved
Statements which failed delivery, were forwarded to a new address, or with an upgraded address are displayed on separate pages as detailed above. Users may choose to acknowledge the status of those statements .
- Select the Statements With Mailed Address Resolved quick link.
- A list of statements which were mailed to the patient while an updated address notice was mailed to the provider displays in a table format.
- Select the Address Upgraded link in the Status column.
- The Statement Preview page displays with limited actions at the bottom.
- Providers with the patient storage package update the patient’s address in the Manage Patients menu.
- Providers with a batch statements package update the patient’s address in the Practice Management System.
Statement Search
The Search section of the Statement Search page is used to search for a statement using the patient name, or the account number.
- Use the appropriate option for the information on hand.
- Use the Patient Name field to enter a patient name as the search criteria.
- Use the Account Number field to enter an account number as the search criteria.
- If none of this information is available, statements can be found using the Advanced Search function.
- Select the Advanced Search button at the bottom of the screen.
- Enter the search criteria.
View Today’s Activities
The View Today’s Activities section of the Statement Search page provides a quick link to all the statements that were entered in to the system today, or had a status update today.
- Select the today’s statements link to view a list of all the statements entered or updated today.
- A list of statements meeting the search criteria displays.
- Select the statement status link to view the statement.
- The statement list can also be filtered by statement status.
- Statuses include: Display All, Duplicate, E-Delivered, Mailed Forward Addr, Mailed Resolved, Mailed Update Addr, Paid, Ready to Release, Undeliverable, and Validation Errors.
Uploaded Files
The Uploaded Files section of the Statement Search page is used to review the status of submitted batch statements.
- Select the transmittal status link to view a list of batch files uploaded to PatientConnect.
- A list of statements meeting the search criteria displays.

- Select a statement list link in the View column to view a listing of the included statements.
- Select the statement status link to view the statement.
Invite Patients
The PatientConnect Portal is a secure web portal where the patient can view and manage Patient Statements, access Patient Education, and receive messages from dentists. Before a patient can receive electronic statements they must sign up for the PatientConnect Patient Portal. Providers can send an email invite to patients so that they can sign up for a patient portal account or they may elect to opt out patients. The patient invite additionally serves the purpose of opting the patient in to receive electronic statements.
- Select the link below to view the video tutorial on this subject.
- Patient Education
Single Patient Sign Up
- From the Dashboard page, under E-Patient Statements section, select the Invite Patient button under the Practice Marketing Services section, or
- From the PatientConnect Welcome Page select the Invite Patient link in the Patient Portal section of the menu.
- Enter patient contact information. Required fields are marked with an asterisk (*).
- Enter an optional message to personalize the email to the patient.
- Select the Send button to send the invitation.
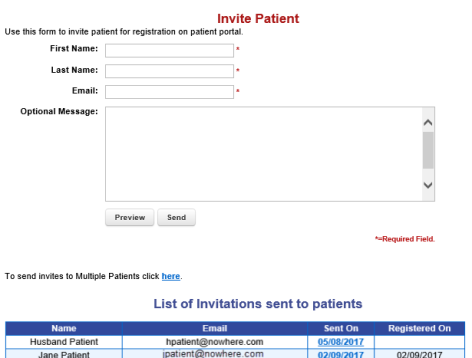
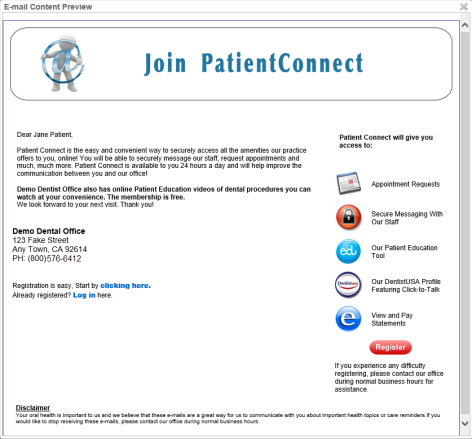
- Select the Preview button to view a preview of the email before sending.
- Note: The optional message appears in bold text below the standardize message.
Multiple Patient Sign Up
- Select the link, To send invites to Multiple Patients click here, at the bottom of the Invite Patient page to send multiple invites.
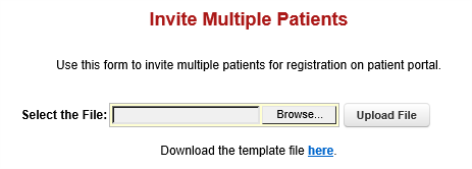
- The Invite Multiple Patients page displays.
- Select the link, Download the template file here, at the bottom of the page to download the excel template.
- Select Enable Editing if the form opens in Protected View.
- Enter patient last name, first name, and email address in columns A, B, and C respectively starting with row 2.
- Optional: Enter a custom message for each patient in column D. Each patient will receive a separate message.
- Save the file to an easy to find location.

- Select the Browse button in PatientConnect to upload the Multiple Invite Sheet.
- Locate the files location.
- Select the file which is displayed in the File Name section and select Open.
- Next, select the Upload File button to proceed.
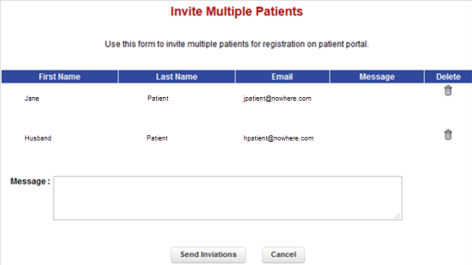
- The Invite Multiple Patients list displays.
- Optional: Enter a message to personalize the email to the patients. Each patient will receive the same message.
- Select the Send Invitations button to send the invitations.
Accepted Invitations
- Regardless of the invite method a listing of invited patients displays at the bottom of the Invite Patient page after the invites have been sent.
- Once a patient has setup a portal account a notification is sent to the DentalXChange Account.
- Note: The New Message indicator
 flashes on accounts with new messages.
 - Select the Account Messages link to review the invitation acceptance message.
- Select the message in the Messages column of the Account Messages table.

- The column Registered On indicates the date the patient registered.
Opt Out Patient
A practice may elect to control in advance if a patient will receive a invite to PatientConnect. There is an option to opt a patient out or send a mass list to opt many patients out.
- To opt out patients, select the Opt Out Patient link on the left navigation pane.
- Enter the information for the patient who should not receive an invite to PatientConnect.
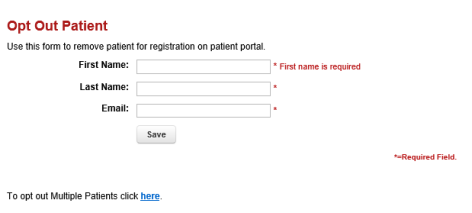
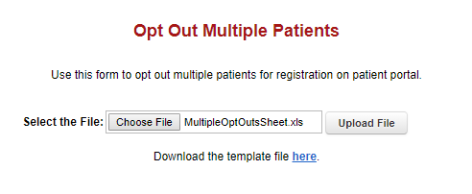
- Select the "To send invites to Multiple Patients click here" link where the provider office is able to download a template to opt out multiple patients and then upload.
- Select the Download the template file here.
- Complete the spreadsheet, save and select the Browse to locate the file.
- Select Upload File.
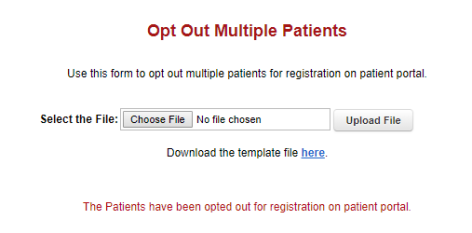
- The file is uploaded.
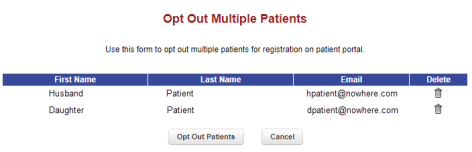
- Confirm any deletions using the Delete icon at this time.
- Select Opt Out Patients button.
- An acknowledgment appears stating The Patients have been opted out for registration on patient portal.
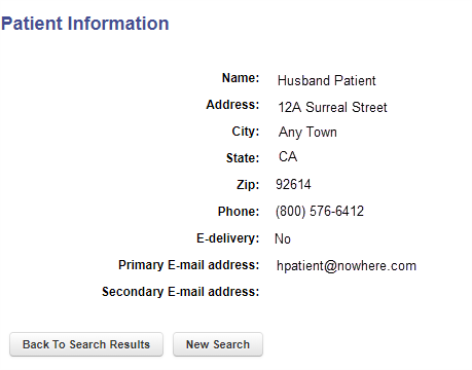
- To review the Opt Out patients refer to Patient Reports > Opted Out of E-delivery type.
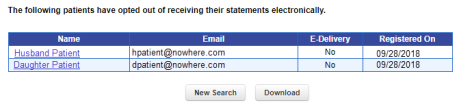
- Selecting the patient name will display the Patient Information.
Patient Reports
Once a patient has signed up for a portal account they are automatically enrolled to receive their statements via email. Patients do however have the option to opt out of electronic statement delivery. Providers may check patient delivery preferences using the Patient Reports search.
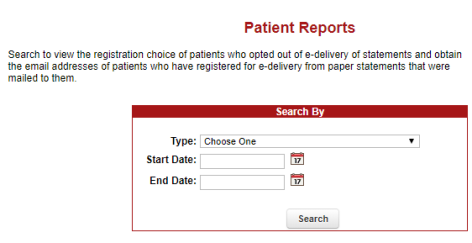
- From the Dashboard page, under E-Patient Statements, select the Patient Reports button, or
- From the PatientConnect Welcome page select the Patient Reports link in the Patient Portal section of the menu.
- Select/Enter search criteria. All fields are required.
- Options for Type include: Registered for E-Delivery from a paper statement, Opted Out of E-Delivery and, All Responses.
- Select the Search button to proceed.
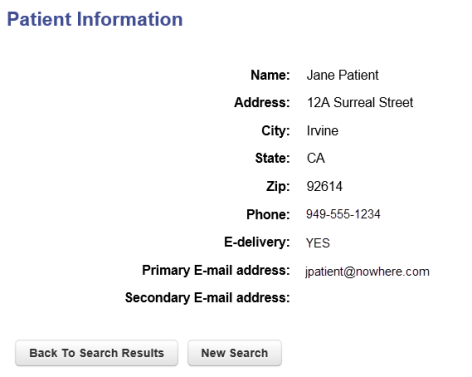
- A listing of registered patients displays.

- Select a patient name to view that patient’s contact information.
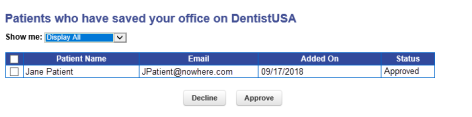
New Patients
Allows a practice to run a report displaying Waiting for Approval, Approved, Declined or Display All for patients who have saved your office on DentistUSA.
- For the patients Waiting for Approval, select the Decline or Approve button.
- Note: Patients Approved or Declined may be changed by selecting the check box and then the appropriate Decline/Approve button to change the status.
*For further assistance, please Contact Us