DentalXChange Attachment Services
Attachments include any supporting documentation such as X-Rays, narratives, periodontal charts, or other images attached to a claim. Insurance Payers then use these attachments to help adjudicate claims. DentalXChange Attachment Services features an electronic attachment application designed by DentalXChange. The application enables practices to complete attachments quickly and easily from the ClaimConnect website.
Visit our Video Library for more helpful tutorials.
- Select the link below to view the video tutorial on this subject.
 Submit an Attachment when Creating a Claim
 Understanding User Generated Statuses
After signing up for DentalXChange Attachment Services, the Practice must download the DentalXChange Desktop Service application (in order to use the Capture Image feature). The Practice may also set up customized attachment rules for the account.
- Log in to the account on the DentalXChange website.
- On the Dashboard page select the Account
 button in the top left corner.
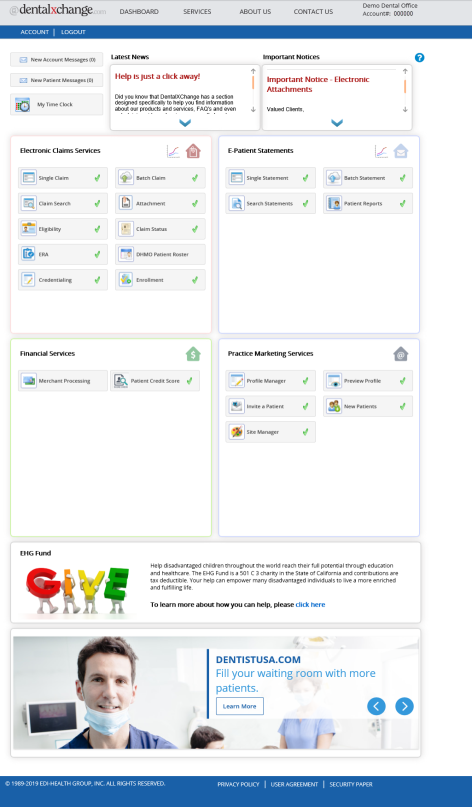
- In the Settings section of the Account page select the Electronic Attachment Settings link.
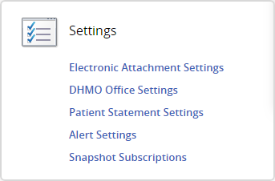
Electronic Attachment Settings
- The Electronic Attachment Settings page opens.
- Under Attachment Rule Management, Validate Secondary EOB is defaulted to Yes indicating that a claim created for a secondary insurer will validate for attachments.
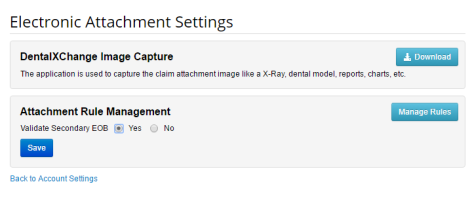
Image Capture Download
Download the DentalXChange Desktop Service application in order to use the Image Capture feature.
- Select the link below to view the video tutorial on this subject.
-
 Install DentalXChange Desktop Services Application
- Navigate to the Account page and select the Electronic Attachment Settings link.

- On the Electronic Attachment Settings page, select the Download
 button.

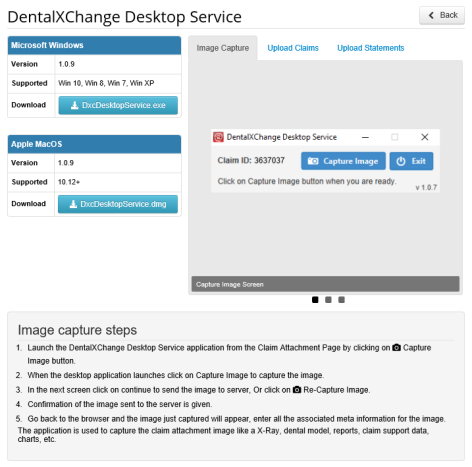
DentalXChange Desktop Service Installer
The DentalXChange Desktop Service page opens to the Image Capture tab, with the steps for using the Image Capture feature listed below.
- Select the DxcDesktopService.exe (for Windows) or DxcDesktopService.dmg (for Macintosh) button to begin download and installation of the application. The following are instructions for Windows installation.
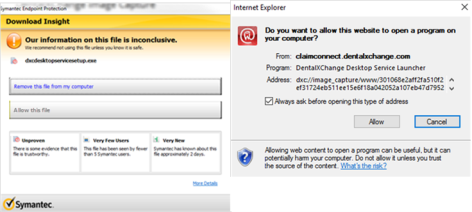
- Run the application. A warning message may display. The message will vary depending on the browser.
- Select the Run button.
- In the event there are any other warnings or pop-up screens, allow access to run the application.
- If a previous version of the DentalXChange Desktop Service application has already been installed on the Practice’s computer the pop-up may state "This setup will perform an upgrade of 'DentalXChange Desktop Service'. Do you want to continue?" A system check will occur each time the program is launched to ensure the latest version is configured.
- Select the Yes button to continue.

- The InstallShield Wizard prepares to install.
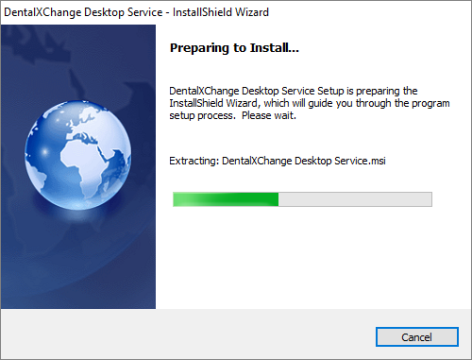
- Select the Next button and continue with the DentalXChange Desktop Services InstallShield Wizard by selecting the correct actions.
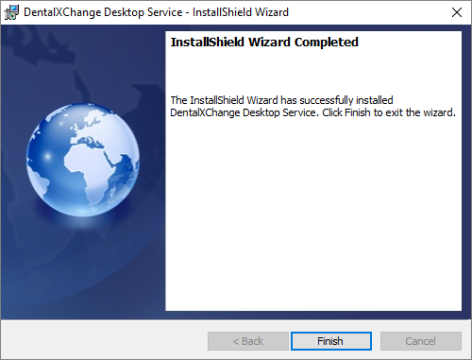
- Once the install has completed, select the Finish button to close the InstallShield Wizard.
- Depending on the browser, you may get a warning about opening the program on your computer.
- Select the Allow button on any warning message that appears.
Payer Lists
Post Login Payer List
- Accessing the payer list will allow a practice to know if a Payer supports electronic attachments. To access the Payer List, navigate to the DentalXChange website and log in.
- From the Dashboard page, under Electronic Claims Services, select the Claim Services Home
 button.
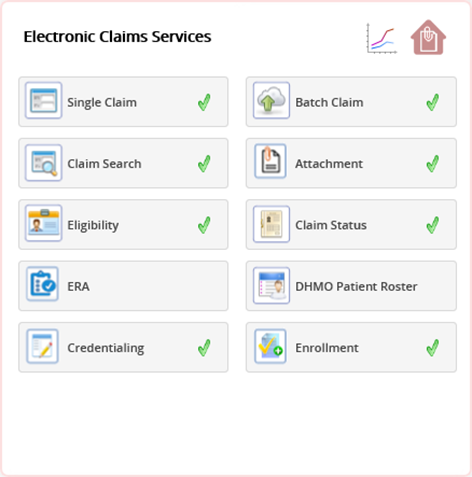
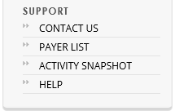
- In the left side menu, under Support, select the Payer List link.
The information on the Post Login Payer List page reflects the attachment package on the account. For users with the DentalXChange Attachment Services package, the attachments column displays details for Payers supported by DentalXChange Attachment Services.
- To view attachment rules for a particular Payer, select the List button, under the ATT column.
- Attachment rules for that Payer will open in a pop-up window.
Manage Attachment Rules
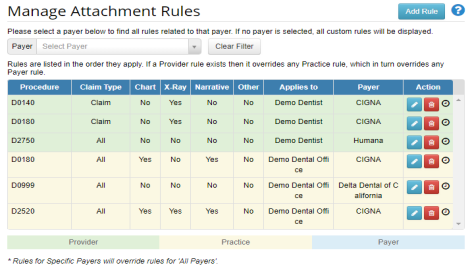
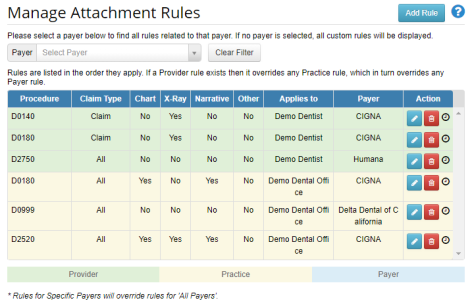
The Manage Attachment Rules page displays. The Practice may use this page to customize rules that determine when they are prompted to create an attachment.
- Select the link below to view the video tutorial on this subject.
 Manage An Attachment Rule
- Note: Practices should rarely need to create additional rules, because Payer Rules are usually sufficient.
- To view all of the rules for a particular Payer, select the Payer from the drop-down menu.
- Rules applied to Providers appear in green with the Practice in yellow and the Payer in blue. A Provider rule overrides any Practice rule which overrides a Payer rule.
- Note: Hover over the clock icon under action to display Created On and Created By information.
- Rules may also be entered and edited from the Dashboard page.
- To add a new rule select the Add Rule
 button.
Add an Attachment Rule
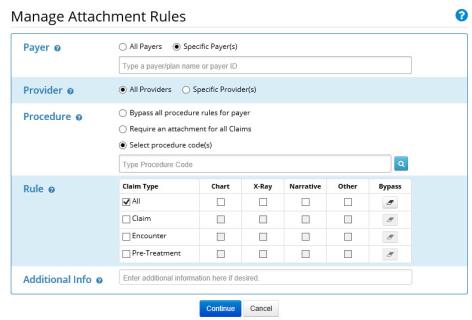
- In the Payer section any Payer entered on the previous page will auto-populate.
- If applying the rule to more than one Payer, enter additional Payer IDs.
- If applying the rule to all payers, select the All Payers radio button.
- In the Provider section (if applying to specific Providers) select the Specific Provider(s) radio button and enter one or more Providers in the text field.
- In the Procedure section select a radio button to determine the types of procedures the rule applies to. If selecting the specific procedure code radio button type one or more codes into the text field.
- In the Rule section check the box to indicate the type of claim this rule applies to: Claim, Encounter, and/or Pretreatment estimate. Make sure to check the type of attachment: Chart, X-Ray, Narrative, and/or Other.
- Additional information may be provided in the Additional Info section.
- Select the Continue button to proceed.
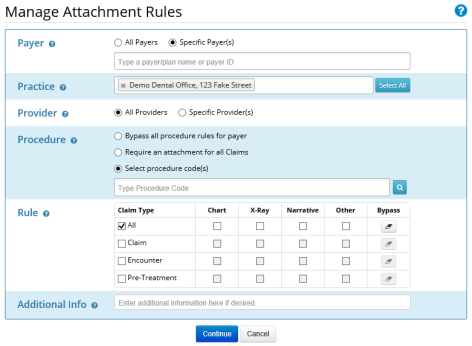
- The Practice feature will appear to users who have more than one group on the account.
- To create a rule that applies to all groups, select the Select All button
Save a New Rule
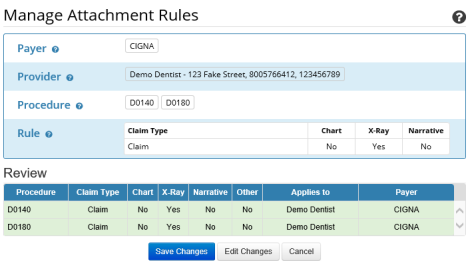
- Review the new rule(s).
- To return to the previous page to make edits select the Edit Changes button.
- To return to the Manage Attachment Rules home page without creating the rule(s) select the Cancel button.
- Select the Save Changes button to confirm the rule(s).
- The new rule(s) will now appear on the Manage Attachment Rules home page.
Claim Attachment Features
On the Claims Needing Attachments or Claim Attachments pages, supporting documents can be attached to a claim.
Add Narrative
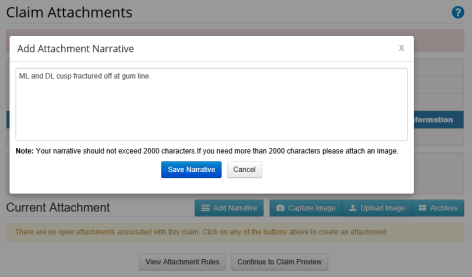
After selecting the Narrative button, a pop-up window appears on the Claim Attachments page.
- Type a narrative in the box.
- Select the Save Narrative button to confirm the entry.
- Note: Narratives longer than 2000 characters must be attached as an image using the Capture Image or the Upload Image functions.
Manage Attached Narrative
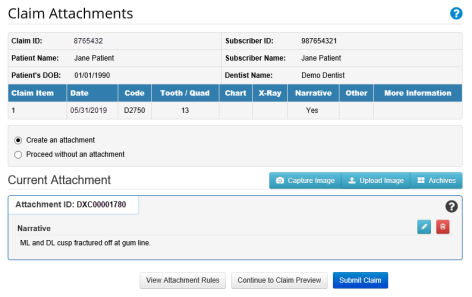
Adding a narrative or image generates an Attachment ID. IDs are alphanumeric, beginning with the letters DXC. A single Attachment ID applies to all of the items in the attachment.
- Hover the cursor over the Question Mark to display a list of button descriptions.
- Select the Edit Item button to make changes to the attachment.
- Select the Delete Item button to remove the attachment.
- Select the Capture Image, Upload Image, or Archives buttons to insert additional items to this Attachment ID.
Capture Image
Launch the Application
After selecting the Capture Image button, the application begins to launch.

If the application does not fully launch, a pop-up window displays with three options:
- To cancel image capture, select the Cancel button.
- To download the software, select the Download DentalXChange Image Capture button. The DentalXChange Desktop Service page will display, where the installer may be downloaded.
- To retry launching the application, select the Retry Capture Image button.

- Select the link below to view the video tutorial on this subject.
 Submit an Attachment when Creating a Claim
Capturing Images
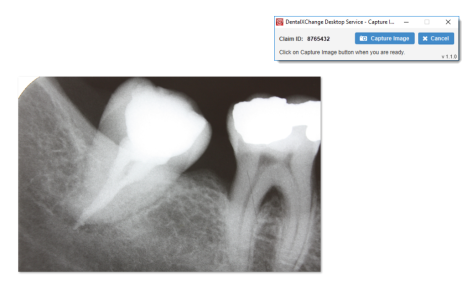
- When the DentalXChange Desktop Service application launches, select the Capture Image button.

- On the Practice computer, open the image to be captured.
- Note: If dual computer monitors are used, the application will capture only on the main monitor.
- Select the Capture Image button.
- Crosshairs will appear. Use the cursor to draw a box around the image to be captured.
Preview Image
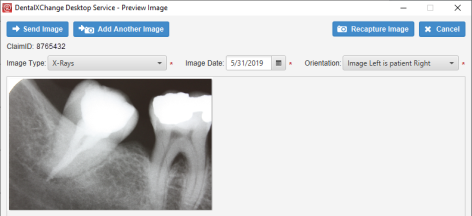
The Preview Image window opens.
- Select the Send Image button to confirm image capture.
- Select the Add Another Image button to add multiple images to a claim.
- Recapture Image button to retake the screen capture.
- Select the Cancel button to close the DentalXChange Desktop Service application.
- Choose an option from the Image Type drop-down: Dental Models, Diagnostic Report, Explanation of Benefits, Other Attachments, Periodontal Charts, Radiology Reports, Referral Form, or X-Rays.
- Enter an Image Date or choose the appropriate date by selecting the Calendar button.
- Specify the Orientation using the menu.
- Most X-Rays are set up so that Image Left is Patient Right.
- Select the link below to view the video tutorial on this subject.
-
 Understanding Orientation of X-Rays
The application sends the image to Claim Attachments.
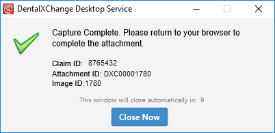
- After the image is sent, a pop-up appears notifying that the capture was complete. Select the Close Now button to continue.
Manage Attached Image
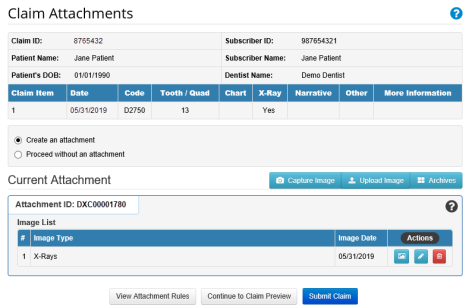
The attached image appears under the Image List, within the Attachment ID section. To manage an attached image:
- Select the Preview Image button to view the image.
- Select the Edit Image Details button to edit the image.
- Select the Delete Image button to remove the image.
- Select the Add Narrative, Capture Image, Upload Image, or Archives buttons to insert additional items to this Attachment ID.
Upload Image
After selecting the Upload Image button, a computer file window opens.
- Navigate to the folder containing the image file and select the image.
- Select the Open button, to proceed.
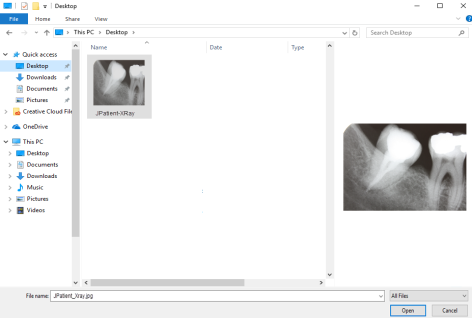
Note: To guarantee visual quality, Capture Image is the preferred method for adding images to attachments. When using the Upload Image feature, make sure that both the size and detail of the image are appropriate.
Add/Edit Image Details
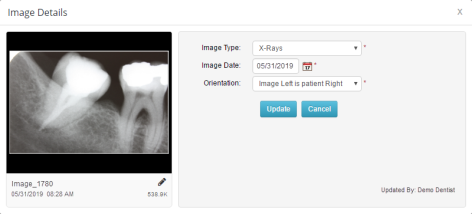
The Image Details window opens.
- Choose the Image Type from the drop-down menu.
- Choose an Orientation if the Image Type is X-Rays.
- Type the Image Date, or select the Calendar button.
- Select the Update button to continue.
Manage Attached Image
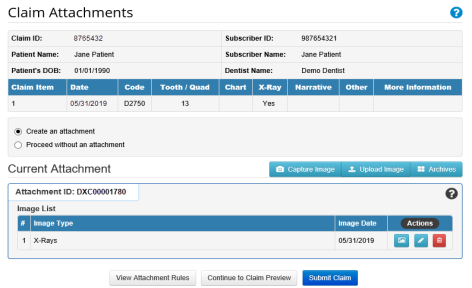
The attached image appears under the Image List, within the Attachment ID section.
- To edit or remove the image, select an appropriate button under the Actions column.
- Select the Add Narrative, Capture Image, Upload Image, or Archives buttons to insert additional items to this Attachment ID.
Archives
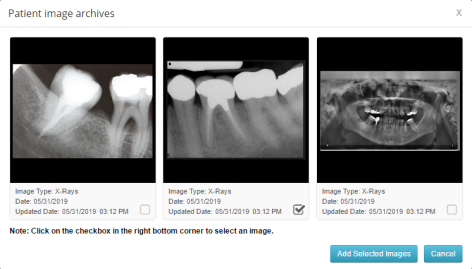
After selecting the Archives button, the Patient image archives window displays. Patient image archives contain any previously attached images for the patient listed on the claim.
- Choose one or more images.
- Select the Add Selected Images button to continue.
Manage Attached Image
As with captured or uploaded images, the archived image is attached, and appears under the Image List, within the Attachment ID section.
- Select the Add Narrative, Capture Image, Upload Image, or Archives buttons to insert additional items to this Attachment ID.

Claim Preview
Once attachments have been added, it is important to review the claim form for accuracy, before submitting.
The following actions are available at the bottom of the page:
- Submit Claim sends the claim and attachment to the Payer.
- Save Claim keeps the claim in the Awaiting Submission status.
- Select the link below to view the video tutorial on this subject.
 Save a Claim for Later
- Delete Claim prevents the claim from being sent to the Payer and changes the status to Deleted.
- Select the link below to view the video tutorial on this subject.
 Delete a Claim
- Mark as Resolved prevents the claim from being sent to the Payer, with a note explaining the reason.
- Mark As Pending lets Providers add notes to the claim while additional information is gathered.
- Select the link below to view the video tutorial on this subject.
 Mark a Claim as Pending
 Pend a Claim when Information is Missing
- Print opens the claim form in a separate window, for easy printing.
- Back to Search Results opens the Claim/Encounter Search page.
- Select the Submit Claim button.
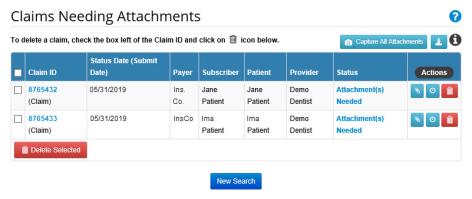
Capture All Attachments
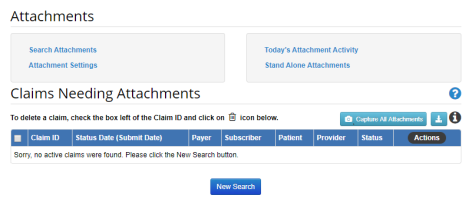
In addition to managing attachments at the individual claim level, attachments can be added to multiple attachments in a single session of the DentalXChange Desktop Service tool by selecting the Capture All Attachments button on the Claims Needing Attachments page.
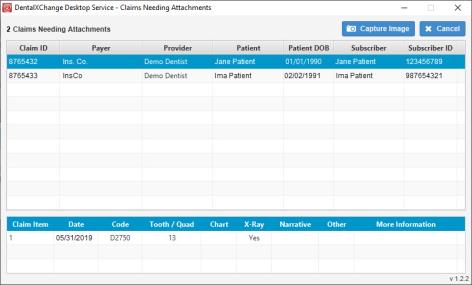
After selecting the Capture All Attachments button, a pop-up window appears displaying a list of any claims requiring an attachment before they can be submitted.
- Select a claim on the list to display more detail in the lower pane of the Claims Needing Attachments window, including the date, procedure code, and type of attachment required according to existing attachment rules.
Capturing Images
- Select the Capture Image button to capture an image for claim selected in the upper pane of the Claims Needing Attachments window.
- On the Practice computer, open the image to be captured.
- Note: If dual computer monitors are used, the application will capture only from the main monitor.
- Crosshairs will appear. Use the cursor to draw a box around the image to be captured.
Preview Image
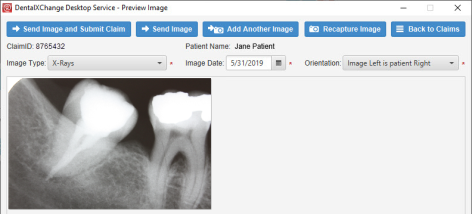
- The Preview Image window opens.
- Select the Send Image and Submit Claim button to add the image and submit the claim.
- Select the Send Image button to add the image to the claim and continue working.
- Select the Add Another Image button to add multiple images to the current claim.
- Select the Recapture Image button to re-take the screen capture.
- Select the Back to Claims button to close the DentalXChange Desktop Service application and return to the Claims Needing Attachments window.
- Choose an option from the Image Type drop-down: Dental Models, Diagnostic Report, Explanation of Benefits, Other Attachments, Periodontal Charts, Radiology Reports, Referral Form, or X-Rays.
- Enter an Image Date or choose the appropriate date by selecting the Calendar button.
- Specify the Orientation using the menu.
- Most X-Rays are set up so that Image Left is Patient Right.
- Select the link below to view the video tutorial on this subject.
 Understanding Orientation of X-Rays
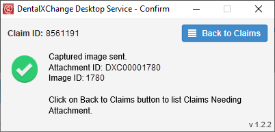
The application sends the image to Claim Attachments.
- After the image is sent, a pop-up appears notifying that the capture was completed. Select the Back to Claims button to continue to the next claim on the Claims Needing Attachments list.
Search Claims with Attachments
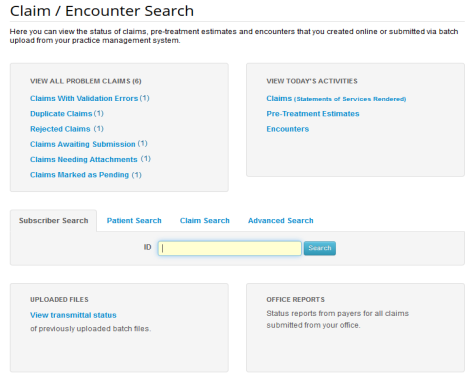
The Claim/Encounter Search page allows a Practice to view problem claims, today’s activity, and to search for claims. When searching submitted claims, it is possible to identify claims that were submitted with attachments.
- Navigate to the Claim Search page, and choose a search option or,
- Select the Claims Needing Attachments link.
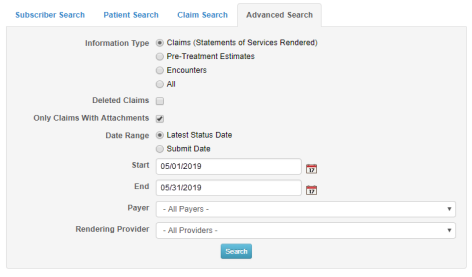
- To search only for attachments, select the Advanced Search tab and check the box next to Only Claims With Attachments.
- Select the Search button to view results.
The list of claims needing attachments is displayed. Claims with an Attachment(s) Needed status will not be sent to the Payer until an attachment is completed. Claims with attachments display a paperclip icon adjacent to the Claim ID.
- Select the Attachment(s) Needed link under the status or the Claim ID link, to view the claim and add an attachment.
- Select the Claim Attachment (blue paper clip) button to add an attachment without viewing the claim.
- Select the Capture All Attachments button to capture images for any claims needing attachments.

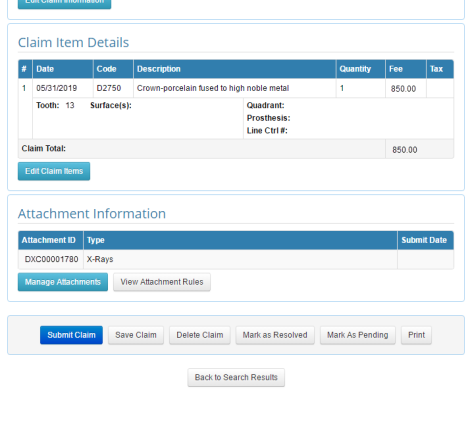
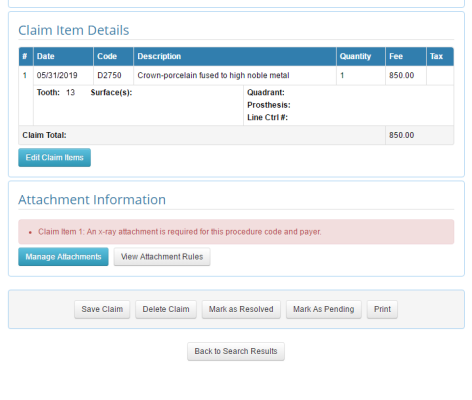
On the Claim Form page, a message at the top (in red) indicates that an attachment is needed. At the bottom of the page, in the Attachment Information section, there are two action buttons available: Manage Attachments and View Attachment Rules.
- To view the attachment rules for this Payer, select the View Attachment Rules button.
- Select the Manage Attachments button to create an attachment for the claim.
- Select the link below to view the video tutorial on this subject.
 Submit an Attachment when Creating a Claim
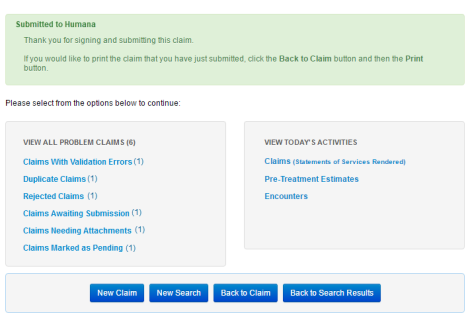
- The claim and the unsolicited attachment are successfully submitted and a submission confirmation message will display.
Unsolicited & Solicited Attachments
DentalXChange Attachment Services supports two types of attachments: Unsolicited and Solicited.
Unsolicited Attachments are created at the time of claim creation. Before submission, the DentalXChange validation process may change the status of a claim to Attachment(s) Needed, based on the Provider, Practice, or Payer Attachment Rules. Only after supporting documentation has been attached will the claim become ready for submission.
Solicited Attachments are created when a claim has already been submitted to the Payer, and the Payer requests additional supporting documentation from the Provider. This request may be made in the form of a mailed Explanation of Benefits (EOB), Electronic Remittance Advice (ERA), or a conversation between the Practice and a representative of the Payer. Once the Payer requests an attachment, the Practice or Provider must send all required documents in order to ensure timely and accurate processing of the claim.
- Select the link below to view the video tutorial on this subject.
 Differentiating Solicited and Unsolicited Attachments
Submit an Unsolicited Attachment
The first step in submitting an unsolicited attachment is to create a claim with a procedure code that requires an attachment.
- For example, procedure code D2750 often requires an attachment, depending on the Payer.
- When a claim needing an attachment is created via Direct Data Entry (DDE), ClaimConnect automatically sends users to the Claim Attachments page to complete the attachment. Continue with Capturing the Image and submitting the claim. If a claim needing an attachment has been uploaded to ClaimConnect, the next step is to locate the claim. Navigate to the Dashboard page, and under Electronic Claims Services, select the Claim Search link.

- Select the Claims Needing Attachments link and complete the claim by attaching the necessary file and submit the claim.
- See Search Claims with Attachments.
Submit a Solicited Attachment
When a Provider receives a request for additional documentation, the first step in completing the request is to locate the previously submitted claim that the request pertains to. The claim will be found in ClaimConnect.
- Select the link below to view the video tutorial on this subject.
 Submit an Attachment Requested by an ERA or EOB
- See Search Claims with Attachments.
- The Claim Form page displays.
- At the bottom of the page, in the Attachment Information section, select the Manage Attachments button.
- Note: In some cases, the Payer may not allow DentalXChange to simply add an attachment to a claim that was previously submitted. DentalXChange identifies these Payers and automatically requests that the Provider create a new claim. When this occurs, the Create Claim and Attachment button will appear. When available, the Provider should select this button.
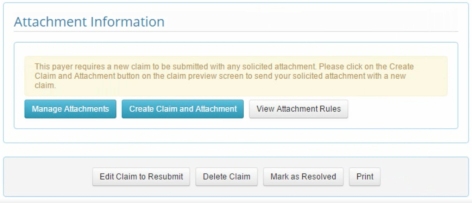
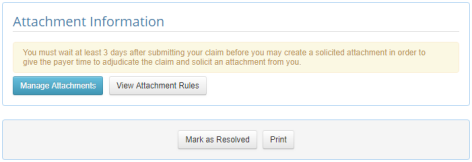
- Note: If a claim is submitted and the practice later goes back to try and add an attachment, the Attachment Information may read: You must wait at least 3 days after submitting your claim before you may create a solicited attachment in order to give the payer time to adjudicate the claim and solicit an attachment from you.
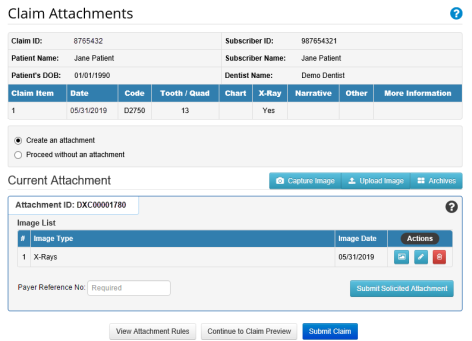
Payer Reference Number
- Review the Explanation of Benefits (EOB) or Electronic Remittance Advice (ERA) sent by the Payer. Identify the requested items, and attach each.
- Once the items are attached, enter the required Payer Reference Number provided on the EOB or ERA.
- Note: The Payer Reference Number is called different things by different Payers (e.g., Document/Attachment/File Control Number, Payer Claim Number, etc.). The Payer uses this number to, among other things, match claims to solicited attachments. This number is not the same as the 5-digit Payer ID; rather, the Payer Reference Number is usually the longest string of numbers displayed on the EOB or ERA, and in some cases may be alpha numeric.
- Select the Submit Solicited Attachment button to proceed.
- Continue with Capturing the Image and submitting the claim.
- A pop-up appears, confirming submission of the solicited attachment.
- Note: If this window does not appear, the solicited attachment may not have been sent.

Stand Alone Attachments
The Stand Alone Attachments feature is available to all users with an attachments package active on their DentalXChange account. This feature enables an attachment to be submitted to a payer outside of the traditional claim submission process. Attachments for all payers accepting attachments can be created prior to the claim, held until a claim for that patient is uploaded, and released with the claim. For some payers, attachments can be created and submitted to a payer in response to the payer's request for additional information, using the payer’s Claim ID as a reference number. There are also a limited number of payers which allow the creation of an attachment which users may enter directly into the payer's system.
Create a Stand Alone Attachment
To create a Stand Alone Attachment, first navigate to the Attachments page. Select Attachments from the dashboard or the left navigation menu in ClaimConnect.
- Select Stand Alone Attachments.
The Stand Alone Attachment Page displays.
- Select the Payer, Billing Provider, and Rendering Provider from the dropdown menus.
- Enter Patient/Subscriber information.
- Specify when the attachment is to be released by choosing the appropriate option under Release the Attachment. Options include the following:
- When DentalXChange receives my claim – DentalXChange will hold the attachment until a corresponding claim is received, delivering the attachment to the payer when DentalXChange delivers the claim. This option is available for all payers who have been configured for DentalXChange attachments.
- Immediately – I have already sent a claim and am responding to a request – DentalXChange will transmit the attachment immediately. This option is only available for payers that currently allow for the submission of a solicited attachment for an existing claim and do not require a new claim to be submitted including the required attachment.
- Note: This option requires the entry of the payer's Claim ID as a reference number.
- Immediately – I will inform the payer to access the Attachment ID – DentalXChange will transmit the attachment immediately. This option is only available when the payer has been specially configured by DentalXChange to receive an attachment without a claim.
- Select the Continue button to proceed.
After selecting the Continue button, the Stand Alone Attachment with corresponding Attachment ID has been created.
- To edit the information entered on the previous screen, select the Edit Attachment Information button.
- Select from the Add Narrative, Capture Image, Scan Image, Upload Image, or Archives options to add the necessary item(s) for submission.
- Note: For more detailed information on attachment options, see the Claim Attachment Features section above.
- Select the Submit button to submit attachment(s).
A confirmation message displays. Message dialog will vary depending upon the option specified for timing the release of the attachment when creating the attachment record.
If the option When DentalXChange receives my claim was selected, users will need to enter the Attachment ID for the DentalXChange attachment into their Practice Management System (PMS). Some PMSs have a special field specifically for an Attachment ID. Others will require that the Attachment ID be entered into the Remarks for Special Services field when creating the claim.

If the option Immediately – I have already sent a claim and am responding to a request was selected, no further action is required. DentalXChange will notify the payer you have responded to their request for information.

If the option Immediately – I will inform the payer to access the Attachment ID was selected, the user must provide the Attachment ID to the payer in a manner consistent with that payer’s expectations. This will vary by payer.

*For further assistance, please Contact Us