Worry Free Registration
Worry-Free Registration is designed to enable providers to create and modify their own DentalXChange account with ease.
- From the DentalXChange website, select the Sign Up button to begin the Worry-Free Registration process.
- Additional users may also be added to an existing account. See Account Settings, Security section > Manage Users for additional assistance.
Visit our Video Library for more helpful tutorials.
- Providers who start on a partner’s website will be directed to the partner specific landing page when accessing DentalXChange.
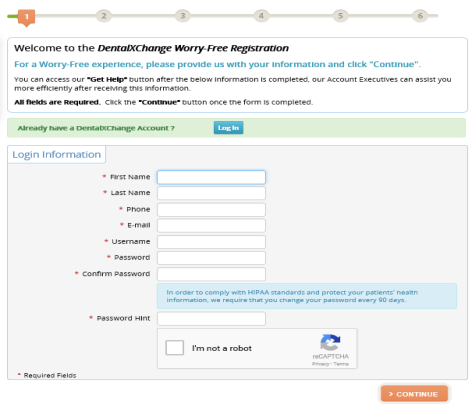
Creating Login Information
Login Information is created to access the DentalXChange account.
- Enter the Login Information. All fields are required.
- Username – The username must be between 6-12 characters.
- Password – The password must be 6-12 characters and contain at least one letter and one number with no more than 2 consecutive characters, and cannot contain the username.
- Select the Continue button to proceed.
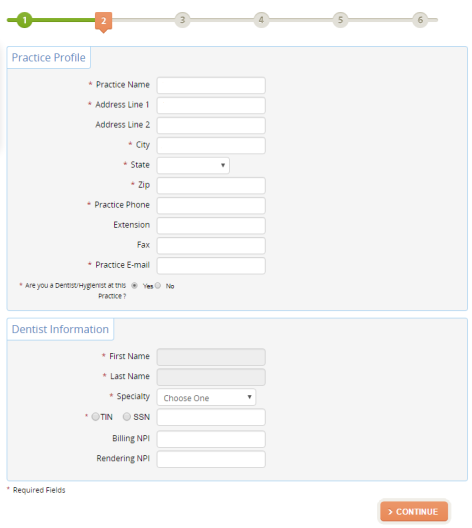
Practice Profile & Dentist Information
A Practice Profile is used to identify the provider’s practice on the DentalXChange site.
- Enter the Practice Profile information.
- Required fields are marked with an asterisk (*).
- Select Yes or No in the Are You a Dentist at this Practice field.
- The Dentist Information section displays only after a selection is made.
- Select Yes to have information from the log in information step prepopulate in the Dentist Information section.
- Select No to manually enter all fields in the Dentist Information section.
- Select the Continue button to proceed.
- Additional providers may be added after initial registration is complete. See Account Settings > Practice Profile and/or Security for adding Providers and/or users.
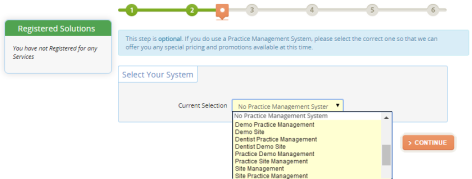
Select Your System
Practice Management Systems (PMS’s) are software used to assist with daily operations of a dental practice. The PMS allows a provider’s practice to capture patient information, schedule appointments, maintain lists of insurance payers, perform billing tasks, send claims, and generate reports.
- Select the PMS used at the practice or select No Practice Management System from the drop-down menu.
- Note: A Practice Management System is not required.
- The PMS selected will dictate available service packages.
- Select the Continue button to proceed.
Services You Are Interested In
The Tell Us about Your Practice section is used to identify products and services of interest to the provider. The Services You Are Interested In section is used to create recommended bundles, and identify available packages to display on the packages screen.
- Select the Number of Locations in the Tell Us about Your Practice section.
- Select the More Info button
 to learn more about how to complete the Services You Are Interested In section.
 - Toggle Yes/No buttons in the Services You Are Interested In section to select services of interest.
- Select Expand buttons
 to view details of each service.
 - Note: All fields are defaulted to Yes.
- Select a Transaction Volume when Electronic Claims is marked Yes.
- Select the Continue button to proceed.

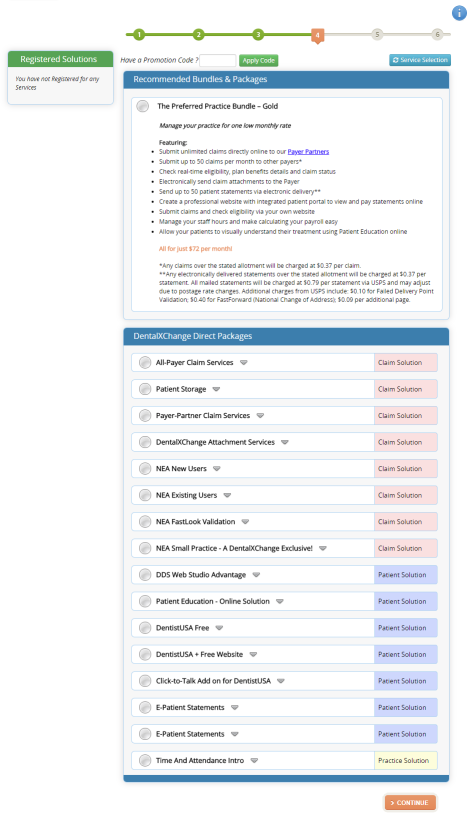
Adding Bundles & Packages
Recommended Bundles & Packages and Available Packages are displayed based on the PMS selected and the Services You Are Interested In selections.
- Select the link below to view the video tutorial on this subject.
 Add a Service or Package
-
Change Practice Management System
- Select the desired packages.
- Enter a promotional code if applicable.
- Select the Apply Code button to view recommended bundles and packages for the code entered.
- Select the Service Selection button to change the Services You Are Interested In selections.
- Select the Continue button at the bottom of the page to proceed.
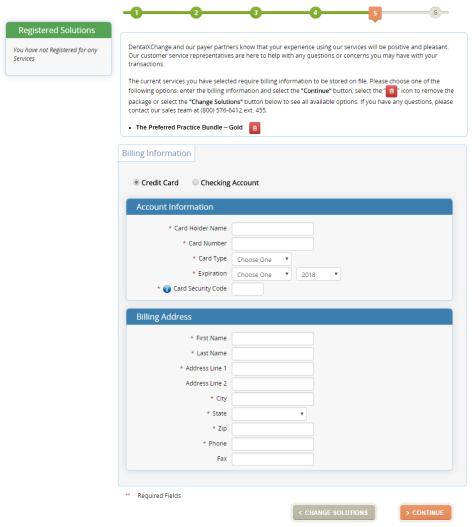
Billing Information
The Billing Information entered is used to charge the account for services monthly. The account will be automatically charged between the 1st and 5th of the month for the prior month of service. The Billing screen will appear every time a provider accesses the DentalXChange site until billing information is entered.
- Select the link below to view the video tutorial on this subject.
- Billing & Reporting
- Select the Credit Card or Checking Account option.
- Complete the Account Information section.
- Complete the Billing Address section.
- Select the Continue button to proceed.
- Select the Change Solutions button to select different bundles & packages.
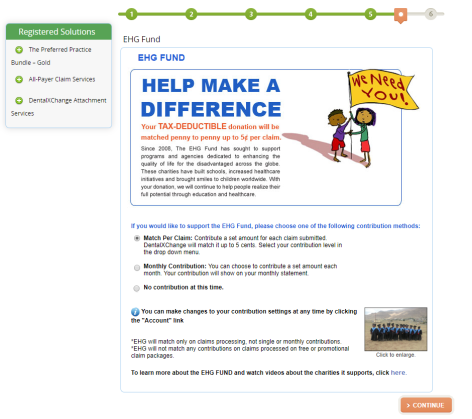
- During the registration the practice is asked to help make a difference and support the EHG Fund. Make the appropriate selection and select Continue to proceed. To learn more about the EHG Fund, select To Learn more about the EHG FUND and watch videos about the charities it supports, click here.
- Note: at any time this contribution may be changed by going to the Account, under Practice Profile select the EHG Fund Contribution Profile link.
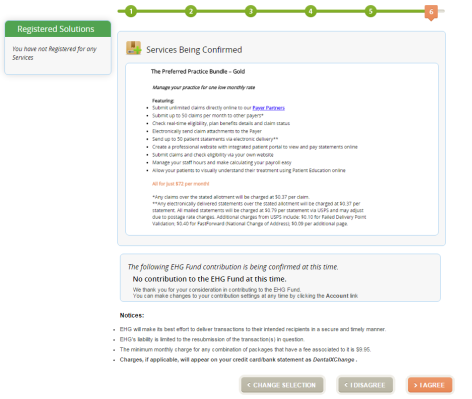
Services Being Confirmed
The Services Being Confirmed section allows a provider to review the services selected. By selecting the I Agree button the provider will complete the Worry Free Registration process.
- Providers select the I Agree button to confirm services.
- Note: Minimum monthly charge disclaimer displays in the Notices section.
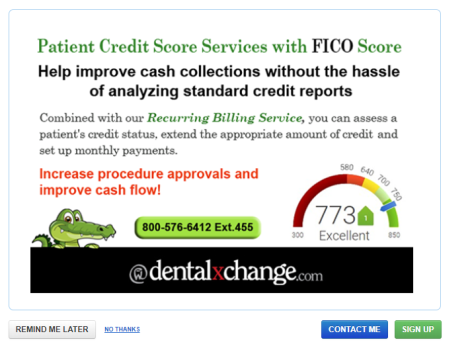
- Upon the first time logging into the practice, user will be presented with an option to Sign Up for Patient Credit Score Services with FICO Score if it was not selected as a package during initial sign up.
- Either select the Remind Me Later, No Thanks, Contact Me or Sign Up buttons as desired to proceed.
*For further assistance, please Contact Us